Largely based on the original eFinder concept, but adopting the Pi HQ camera, Pi Zero 2 W processor and Tetra3 plate-solver, all contained in a single housing.
Tetra3 can plate-solve very fast, but setting focus, gain and exposure is very important. To help achieve this two functions were added …
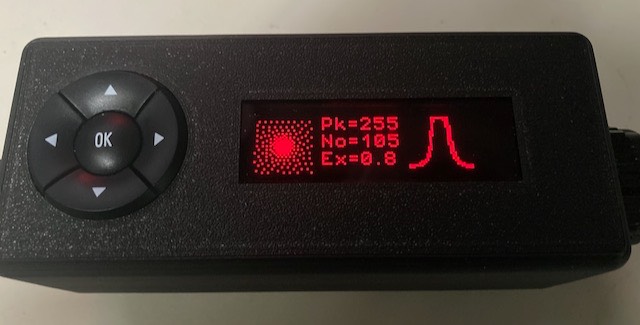
Assist Screen
This screen shows a thumbnail image of the brightest star in the eFinder image along with a point spread function (PSF) plot of its intensity profile. This can facilitate fine focusing, plus the up and down arrow buttons change exposure time.
IP address
In ‘Live’ mode it can display the IP address assigned by the router in infrastructure mode, or the local IP if in AP mode.
Wifi set up and image display
The eFinder configuration file can be accessed over wifi using a web browser, plus a view of a saved eFinder image.
Auto display & button orientation
The unit includes a tilt sensor and will automatically invert the display & buttons depending on whihc side of the telescopeitis mounted. This can be omitted and set manually.
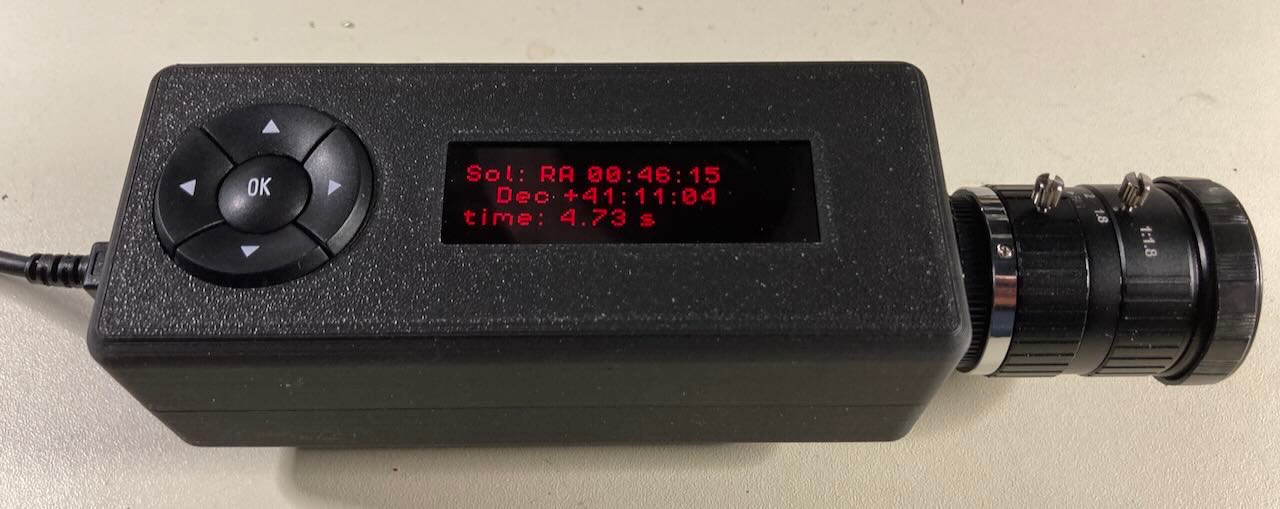
eFinder ‘Live’
A recent update is to add a gps module to eFinder Lite. If the eFinder Lite is plugged into an ordinary 5V usb supply (ie not a Nexus DSC) then eFinder ‘Live’ will start instead. This uses continuous plate-solving to determine telescope position and relay it over wifi to SkySafari or similar.
Build Instructions
Parts list
Raspberry Pi Zero 2 W with headers
Waveshare USB & UART HAT (can be omitted with latest Nexus DSC Pro firmware)
2.23” OLED HAT, Waveshare
adxl345 accelerometer (optional)
gps module BN-220 (only required for ‘Live'mode)
Raspberry PI HQ Camera (or ASI120)
Pi Zero camera flex cable (or USB cable for ASI120)
25mm f1.2 c-cmount lens, or similar
5 way navigation switch
Micro usb jumper cable
Assorted spacers, screws & wire
Case. 3d print files available
Assembly
If the Pi Zero is purchased with headers pre-soldered, then there are just 11 wires to be soldered.
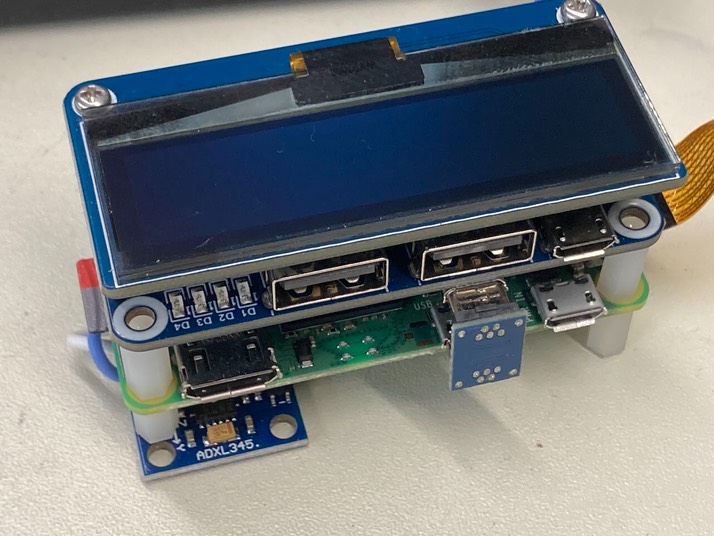
The Pi Zero, USB & UART HAT and OLED HAT simply plug into each other forming a neat ‘stack’. Use m2.5 x 10mm nylon spacers under the stack and between layers.
Solder wires from the underside of the Pi Zero to the 5 way switch and adxl345.
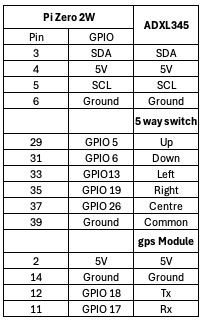
The table below gives the destination for each wire.
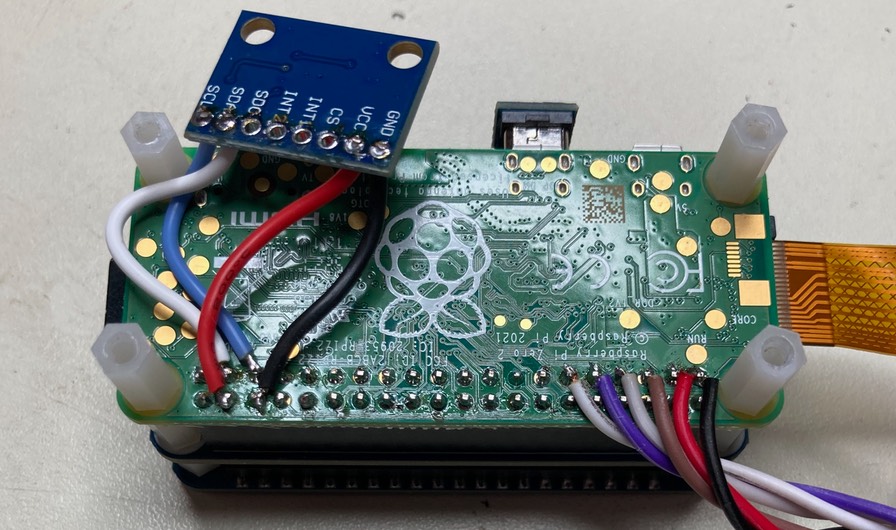
Shorten the nylon pillar at top left in the photo (above) by 1.4mm and use that gap to secure the adxl345 board when assembling into the case.
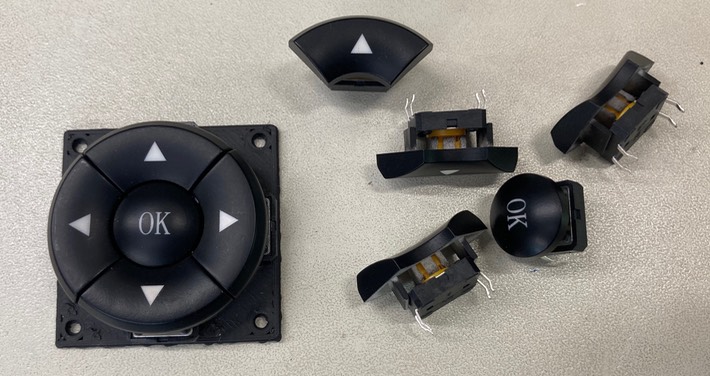
The 5 way switch can be purchased ready assembled on to a pcb, but it is expensive. Very much cheaper is to buy the switch modules. A 3d print file is available to make a small board to mount the switches on.
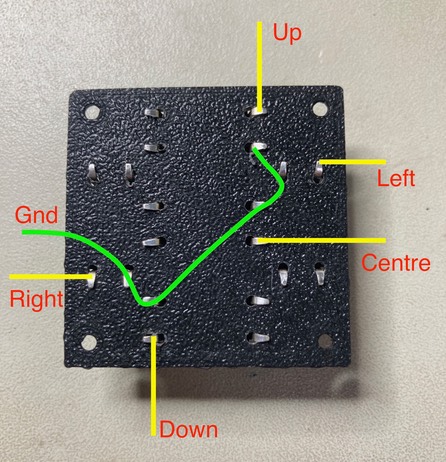
The wires from the Pi Zero are soldered directly to the switch pins on the reverse side. Strip about 40mm of the ground wire and solder to the 5 pins as shown in the photo.
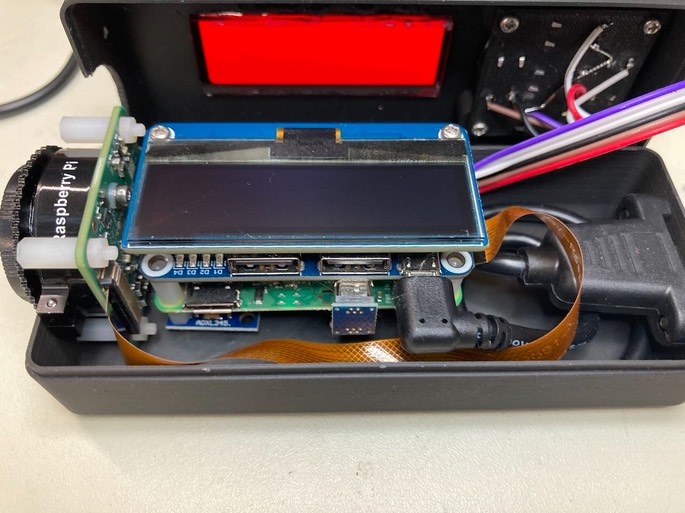
You will need a case. 3d print files are available suitable for the 3 camera options. Below is the assembled case for the Pi HQ camera (recommended). Visible is the micro USB jumper cable going from the UART socket on the HAT, to the back of the same.
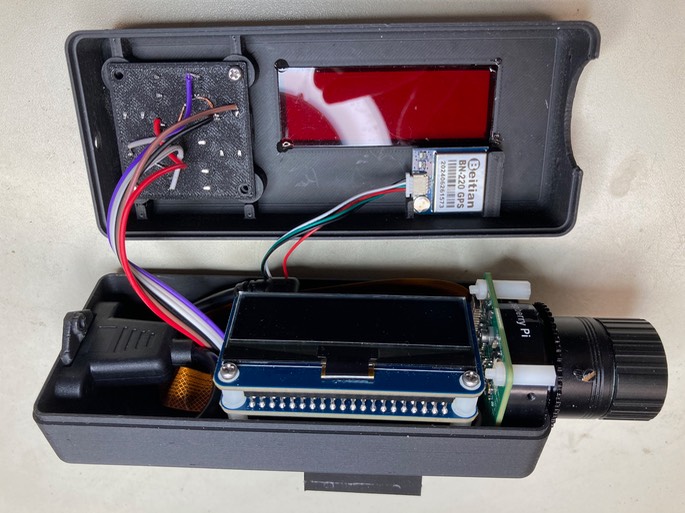
A recent update is to add a gps module to eFinder Lite. If the eFinder Lite is plugged into an ordinary 5V usb supply (ie not a Nexus DSC) then eFinder ‘Live’ will start instead. This uses continuous plate-solving to determine telescope position and relay it over wifi to SkySafari or similar. The case needed to be modified a little to mount the gps module on the top for a good sky view. Photo below …
Firmware
The firmware can be installed from my gitHub repo
Prepare a new SDcard (16 or 32GB) with the latest Rasperry Pi Zero Bookworm Lite 64 bit OS. Before writing the card, make sure the username is ‘efinder’ and you have configured the wifi to connect to an available router, (the Pi Zero has no ethernet port). Also ensure the card is prepared with ’ssh’ enabled - you will need this to connect later. Insert the prepared card in the Pi Zero, along with a keyboard and monitor and after a couple of boots it should connect to your wifi. In a terminal window over ssh execute each of the following commands
wget https://github.com/AstroKeith/eFinder_Lite/raw/main/install.sh
sudo chmod a+x install.sh
./install.sh
The last command will take at least 30 minutes, but should leave you with a fully working eFinder Lite. Click here for the eFinder Lite User Manual, here for the eFinder Live Manual.
Contact me for 3D printer file etc.